Some of the most common and troublesome installation errors are avoided by proper pre-installation, identification, inspection and alignment of all the parts involved.
Pre-Installation
1. Inspect the valve to be certain the waterway is free from dirt and foreign matter. Be certain the adjoining pipeline is free from any foreign material that could damage the seat and disc sealing surfaces.
2. Actuator should be mounted on the valve prior to installation to facilitate proper alignment of the disc in the valve seat.
3. Check the valve identification tag for materials, and operating pressure to be sure they are correct for the application.
4. Check the flange bolts or studs for proper size, threading, and length.
WARNING! Personal injury or property damage may result if the valve is installed where service conditions could exceed the valve ratings.
Installation
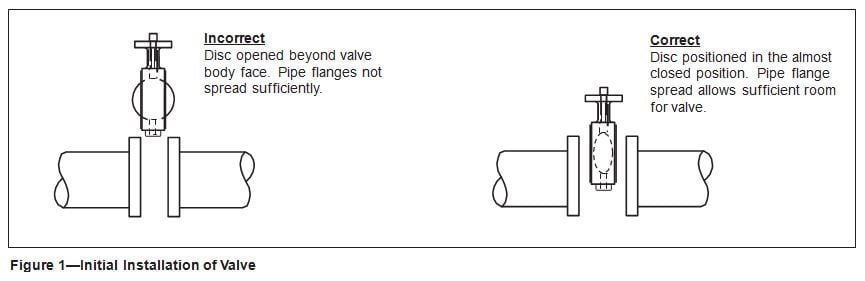
Position the connecting pipe flanges in the line to insure proper alignment prior to valve installation. Spread the pipe flanges apart enough to allow the valve body to be located between the flanges without actually contacting the flange surfaces (See Figure 1). Exercise particular care in handling the valve so as to prevent possible damage to the disc or seat faces.
1. For Lug style valves:
- Place the valve between the flanges.
- Install all bolts between the valve and the mating flanges. Hand tighten bolts as necessary.
2. Before completing the tightening of any bolts, the valve should be centered between the flanges and then carefully opened and closed to insure free, unobstructed disc movement (see Figure 2).
3. Using the sequence shown in Figure 3, tighten the flange bolts evenly to assure uniform compression.
4. Cycle the valve to the fully open position, then back to the fully closed position, checking the actuator travel stop settings for proper disc alignment. The valve should be operated to assure that no binding is taking place.
5. The valve is now ready for operation.
Remember: Install the valve with the disc in the “ALMOST CLOSED” position. Do not use any flange gaskets.


